How to install slatwall in a garage
Drywall over studs, bare studs, or masonry — the three cases, and the fastener each one needs.
#ad We earn a commission if you buy through this link, at no extra cost to you. How this site is funded. Prices last checked October 17, 2026.
Quick picks
The panels this install sequence is written for, and the fastener specification each one publishes.
| # | Product | Best for | Published rating | Buy |
|---|---|---|---|---|
| 1 | 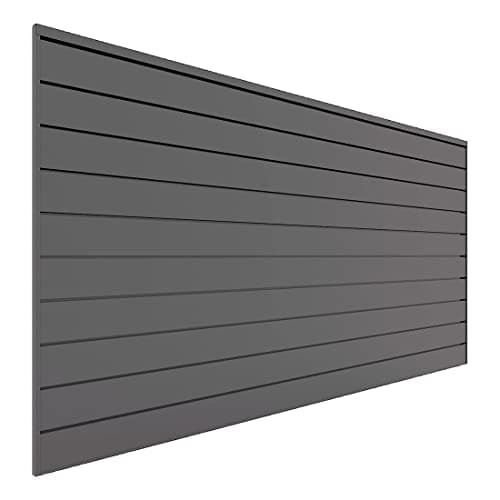 Fastener spec published Proslat PVC Slatwall Panels 1-1/2 inch #8 pan head screws, studs at 16 inch centers. | A full wall done once, on a normal stud-framed garage | 75 lb / sq ftInstall doc | |
| 2 | No photo InstallStrip method storeWALL Heavy Duty Slatwall Panels Capacities published with HD InstallStrips. | Anyone hanging shelves and brackets, not just hooks | 300 lb / sq ft165 lb at 4″ outManufacturer |
#ad We earn a commission if you buy through this link, at no extra cost to you. How this site is funded. Prices last checked October 17, 2026.
Slatwall is not difficult to install. It is easy to install badly, and the two most common ways are hitting drywall instead of studs, and starting from a course that is not level — which compounds across a whole wall until the last panel will not line up.
Tools and materials
- Stud finder (an electronic one; the magnet type finds screws, not centers)
- 4-foot level, or a laser level
- Drill/driver with the bit the manufacturer specifies
- Tape measure and pencil
- Circular saw or fine-tooth handsaw for cuts — see the cutting guide
- The screws the manufacturer specifies, not whatever is in the jar
- A second pair of hands for 8-foot panels
The sequence
- 01
Find and mark every stud
Run the stud finder across the whole wall at about chest height and mark each center with a pencil line from floor to ceiling. Verify the spacing is consistent — 16 or 24 inches on center is normal. If it is neither, or if it is irregular, stop and work out why before you drill anything. - 02
Decide the top and bottom of the panel field
Most garages want slatwall from roughly 3 feet off the floor to around 7 feet. Below 3 feet is where trash cans and bikes lean; above 7 feet you cannot reach without a step. Mark both lines. - 03
Snap a level line for the first course
This is the step that determines whether the whole wall works. Garage floors slope toward the door and garage walls are rarely square, so measure up from the floor at several points, take the highest, and set your line off the level rather than off the floor. - 04
Dry-fit the first panel and check the cut
Hold the panel to the line, check that its ends land where you want them, and mark any cut before fixing anything. It is far easier to adjust the layout now than after four panels are screwed up. - 05
Fix the first course to the line
Drive the specified screw through the panel into every stud it crosses. Do not skip studs to save time — the published rating assumes every one of them. Set screws flush, not countersunk into the PVC, which distorts the panel around the head. - 06
Work upward, interlocking each course
Most systems interlock tongue-and-groove, which hides the screws and self-aligns each course. Check level every second course rather than trusting the interlock — a small error at the bottom is a visible one at the top. - 07
Stagger the vertical joints
Do not stack end joints in a column. Offset them course to course the way you would with brickwork, so no vertical line of weakness runs up the wall and the finished field reads as one surface. - 08
Fit the trim and finish strips
Edge and corner trims cover the cut ends and stop the top course looking unfinished. They are the difference between a wall that looks installed and one that looks stuck on. - 09
Load it in stages, not all at once
Hang the heaviest items first and check nothing moves before you fill the rest of the wall. If a hook or bracket shifts under load, the fixing behind it missed a stud — find out now rather than when the shelf is full.
The three substrates
Drywall over wood studs — the normal case
The panel screws pass straight through the drywall into the stud behind it. The drywall is doing nothing structural; it is a spacer. What matters is that the screw is long enough to get real purchase in the stud after crossing the drywall — typically 1/2 inch of drywall plus the panel thickness before it even reaches wood. Proslat’s specified 1-1/2 inch screw is sized for exactly this.
Bare studs — easier, and check the panel supports it
Fixing straight to studs with no drywall is simpler and stronger, and Trusscore explicitly states its SlatWall can be installed directly to bare studs or over drywall. Note that spanning bare studs means the panel itself bridges the gap between them with nothing behind it, so the manufacturer’s stated stud spacing becomes a hard requirement rather than a suggestion.
Masonry — different rules entirely
There are no studs. The fastener goes into block or poured concrete, and the published panel rating no longer describes the assembly — the anchor does. Flow Wall is the one system here that names block, cement and brick on its product page and ships dowels for the purpose. Everything about sizing anchors, telling solid block from hollow, and what a rating means when the manufacturer never contemplated your wall is in the drywall, studs and masonry guide.
The four mistakes worth avoiding
- Starting level off the floor. Garage floors slope to drain. Use a level, always.
- Anchors instead of studs. Wall Control publishes the cost of this at 2x capacity. Every other system has the same physics and does not tell you.
- Over-driving the screws. A screw head pulled into PVC distorts the slot around it and weakens exactly the feature the accessory hooks into. Flush, not sunk.
- Stacked vertical joints. Offset them. It costs nothing and it is the difference between a wall and a patchwork.
Common questions
Can slatwall be installed over drywall?
What screws do you use for slatwall?
How high should slatwall be installed?
Do you need to hit every stud when installing slatwall?
Sources
- Proslat FAQ — 1-1/2 inch #8 pan head screws, 16 inch stud spacing
- Trusscore SlatWall — direct to bare studs or over drywall
- Wall Control — 200 lb into studs vs 100 lb into drywall anchors
- Flow Wall — masonry substrates and included dowels
Figures were read on the dates shown against each source. If one has changed, or if we have got something wrong, tell us and we will correct the page.
Read next
- SlatwallHow to cut slatwall panelsBlade tooth counts by panel material, and the technique that stops PVC chipping along the slot edges.
- Planning & installMounting into drywall, studs and masonryThe substrate case nobody else covers: what happens to a published rating when the wall is block rather than studs.
- SlatwallHow much weight can slatwall actually hold?The full cross-brand load table, normalized into one unit, with what each rating assumes stated beside it.
- SlatwallHow many slatwall panels do you needWhat a section, a case and a pack actually cover, which brands publish a coverage figure, and how to work out your own.