How to install an overhead garage rack
The one job on this site where getting it wrong drops 600 lb onto a car.
#ad We earn a commission if you buy through this link, at no extra cost to you. How this site is funded. Prices last checked October 17, 2026.
Quick picks
The racks whose install requirements are published in enough detail to follow.
| # | Product | Best for | Published rating | Buy |
|---|---|---|---|---|
| 1 | 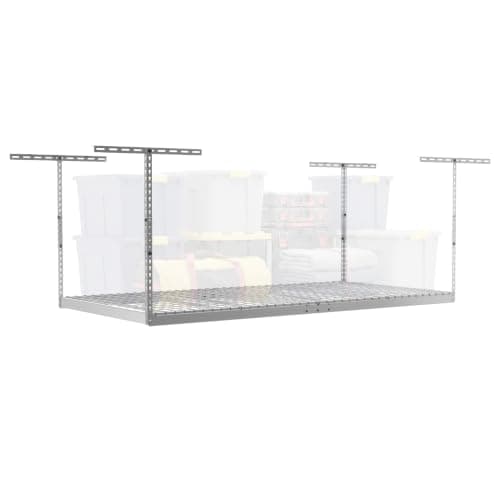 Fullest published install spec SafeRacks 4x8 Overhead Garage Storage Rack Joist size, spacing, lag penetration and pilot hole all stated. | A conventional wood-framed garage ceiling | 600 lb totalInstall doc | |
| 2 | 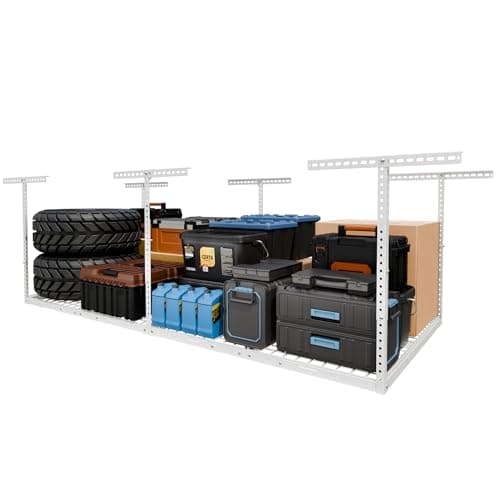 Published test margin FLEXIMOUNTS 4x8 Overhead Garage Storage Rack 600 lb rated with a stated 1,200 lb load test. | Buyers who want a published test margin, not just a rated figure | 750 lb totalManufacturer |
#ad We earn a commission if you buy through this link, at no extra cost to you. How this site is funded. Prices last checked October 17, 2026.
Before you buy anything
- Establish what the ceiling is. Wood joists, engineered trusses, steel, or concrete. If you cannot tell, find out before ordering.
- Measure the joist spacing. 16 or 24 inches on center is normal. Wider than the manufacturer’s stated maximum means the rack is not rated for your ceiling.
- Measure the drop clearance. Ceiling to the underside of the garage door when fully open. This is the number that decides which rack you can buy.
- Check what is above the ceiling. Living space above changes the framing, and there may be services running through it.
Tools and materials
- Electronic stud finder (for joists through a finished ceiling)
- Drill with a 3/16 inch bit long enough to reach 3 inches
- Socket driver or ratchet for the lag screws
- Tape measure, pencil, chalk line
- A stable platform — not a chair
- A second person, without exception
- Decking: 3/8 inch plywood or the manufacturer’s wire deck
The sequence
- 01
Find and mark the joists
Locate joist centers across the whole area the rack will occupy and mark them. Confirm the spacing is consistent — a joist that is not where the pattern says it should be is worth understanding before you drill into it. - 02
Verify the joists meet the specification
SafeRacks requires a minimum 2x6 cross section and a maximum 24 inch spacing, with 2x4 accepted only for a truss bottom chord. If you cannot confirm the joist size from the attic or an exposed edge, do not proceed on an assumption. - 03
Position the rack so brackets span two joists
The SafeRacks brackets are 27 inches and are designed to span two joists. Set the rack position so every bracket lands correctly; this constrains where the rack can go far more than the wall does. - 04
Mark all fixing points and check them square
Chalk-line the bracket positions and measure the diagonals before drilling. A rack fitted out of square will not accept its decking cleanly and cannot be adjusted afterwards. - 05
Drill the pilot holes
3/16 inch, 3 inches deep, at each marked point. Pilot holes stop the lag splitting the joist and let it drive straight rather than wandering along the grain. - 06
Fit the ceiling brackets
Drive the lag screws until at least 2 inches of thread is in solid joist. Two people: one holding, one driving. Do not fully tighten until every bracket in the set is started, so there is room to adjust. - 07
Set the drop height and hang the frame
Choose the drop from your measured clearance, not from the middle of the adjustment range. Hang the frame and check it is level in both directions before tightening. - 08
Fit the decking
3/8 inch plywood cut to the frame, or the manufacturer’s wire deck. Fix it down rather than leaving it loose — a shifting deck is how a bin slides off an edge. - 09
Test the garage door before loading
Open and close the door fully and watch the clearance. Do this before anything goes on the rack, while adjusting the drop height is still a five-minute job. - 10
Load in stages, heaviest to the center
Put weight on gradually and check nothing moves. Keep heavy items toward the middle of the span rather than the ends, and distribute rather than concentrating. Then check the fixings again a week later.
2inches minimum lag penetration
SafeRacks' published requirement, into a joist of at least 2x6 nominal lumber spaced no more than 24 inches apart, through a 3/16 inch pilot hole drilled 3 inches deep. Everything the 600 lb rating means depends on this.
The mistakes that matter
- Fixing into the ceiling board rather than the joist. The single most dangerous error in this project. Drywall holds nothing.
- Assuming joist size. If you have not confirmed it, you do not know it, and the rating does not apply.
- Skipping the pilot hole. A lag driven dry into a joist can split it along the grain, and a split joist is a compromised joist.
- Choosing the drop height by eye. Measure to the open door, not the closed one.
- Loading it all at once. Stage it, and check.
- Doing it alone. Overhead work with a heavy frame and a ladder is not a solo job.
One manufacturer publishes its joist spacing limits and its stud count per bracket outright; those requirements are set out in the FLEXIMOUNTS review.
One manufacturer publishes the pilot hole size, the lag penetration and the minimum joist for its rating; those figures are set out in the SafeRacks review.
Common questions
What size joists do you need for an overhead garage rack?
Can you install an overhead rack on a concrete ceiling?
How do you find ceiling joists in a garage?
How far should an overhead rack hang from the ceiling?
Sources
- SafeRacks 4x8 — joist requirements, lag penetration, pilot hole, prohibited ceilings
- FLEXIMOUNTS GR48 — drop range, decking recommendation, load test
Figures were read on the dates shown against each source. If one has changed, or if we have got something wrong, tell us and we will correct the page.
Read next
- Racks & shelvingThe best overhead garage storage racksRated capacity, published test margins, and the joist requirements each rack needs to reach its rating.
- Planning & installMounting into drywall, studs and masonryThe substrate case nobody else covers: what happens to a published rating when the wall is block rather than studs.
- Racks & shelvingWhat overhead garage storage costsWhat the rack price leaves out, and when paying for installation is the right call.
- Racks & shelvingSafeRacks vs FLEXIMOUNTSTwo 4x8 racks rated identically, compared on the fastening and margin disclosures that actually differ.
- Racks & shelvingFLEXIMOUNTS overhead garage racksThe GR48 publishes a test figure as well as a rated one - and the rated figure changed. What that tells a buyer.
- Racks & shelvingSafeRacks overhead garage racksThe 4x8 rack that publishes joist size, spacing, pilot hole and lag penetration - and what it leaves out.